Crunch on these! Eat them right out of the jar, or chop them up – they lend bright flavors to all kinds of dishes. Fun, easy and super-quick to prepare!
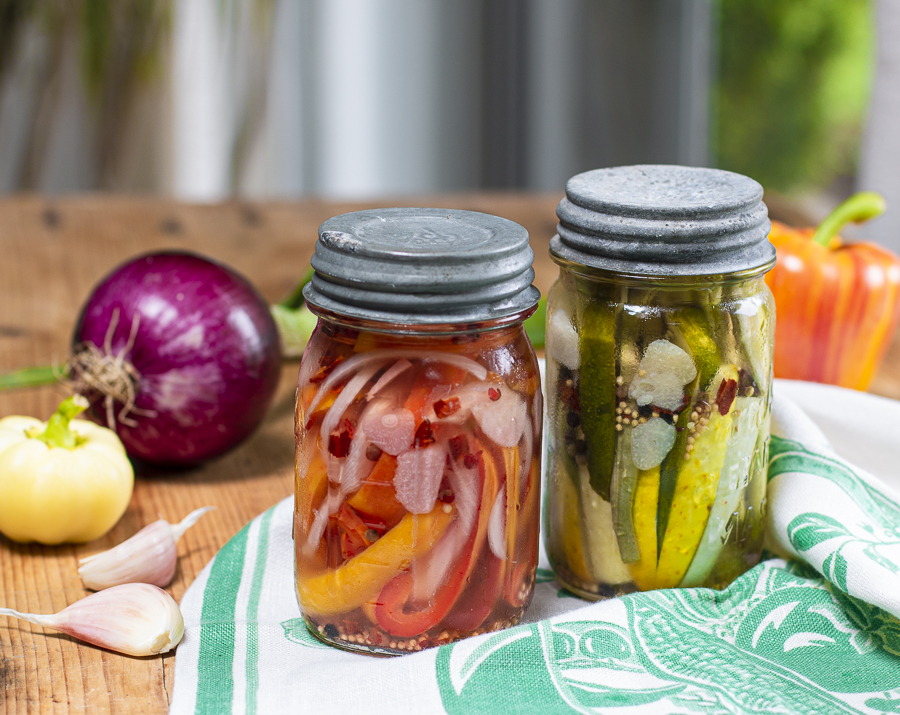
These Pickled Vegetables have a little spice going on too — mustard seeds, chile peppers, multi-colored peppercorns, sliced garlic along with vinegars.
I’ve chosen Fiesta Striped Peppers and Red Onion in one jar…
White, Green and Yellow Cucumbers & Green Beans and Wax Beans in the other.
Ingredients
- 2 pint sized mason jars with lids
- 1 cup vinegar - 1/2 cup white balsamic, 1/2 cup distilled white vinegar
- 1 cup filtered water
- 1 tablespoon kosher salt
- 2 tablespoons pure cane sugar
- 1 teaspoon mixed colored peppercorns
- 2 medium fresh garlic cloves, peeled, thinly sliced
- 1 1/2 teaspoon dried chile peppers, torn
- 1 teaspoon mustard seeds
- Vegetables: Use 3 cups for 2 pint mason jars 1 large red pepper, about 1 1/4 cups (I've used a Fiesta Pepper, red & orange striped)
- 1 small-medium red onion, peeled
- 2 small cucumbers, cleaned (I've used white, yellow and green heirloom cucumbers)
- 3/4 cups green beans, about 1/3 pound (I've used green, purple and wax beans)
- Optional Add-Ins Fresh Herb Sprigs - a few for each jar
Instructions
- Use about 3 cups of large cut vegetables... have a little more on hand if you fill very tightly.
- Prep your vegetables. Wash them well and slice, or cut into spears, or leave whole - like with green beans.
- Brine: Bring the vinegars, water, salt and sugar to a boil in a non-reactive pot. Stir until all has dissolved. In the meantime - pack the 2 jars tightly with the prepped veggies. Portion the spices and sliced garlic into each jar. (Can add cleaned, fresh herb sprigs.)
- Pour the hot brine onto the jars (use a measuring cup or funnel.) Make sure all is submerged, and covered with the brine. Leave 1/2 inch of space on top, cover with the tops. Set on countertop and refrigerate when cool.
- These taste great in 24 hours. Keep for up to one month. For long storage, use a hot canning method.
See BLOG for many more photos and more information.
This recipe may not be reproduced without the consent of its author, Karen Sheer